Or even worse. Maybe you’ve already used resin only to have a sticky, gooey mess. And you’re doubting whether this resin crafting thing is more trouble than it’s worth.
I’m glad you’re here. Not because you’re struggling. But because I can help.
My name is Katherine, and I want to be your resin yoda, young padawan.
For the last sixteen years, it’s been my mission to help artists and crafters use epoxy resin to make something they can’t WAIT to show off.
All while avoiding mistakes and wasted products. Because I’ve already done that for you. You can read about my artist misadventures and how I’m fighting the dark side of resin failures.
Let me start by saying that it makes total sense that you’d ask, ‘What’s the best epoxy resin?’
But here’s the thing–
The answer is a little complicated. Kinda like asking
What’s the best car?
Where’s the best place to live?
Who are the best cats in battle cats?
There’s more you need to know before you can answer those questions. Like if it were me, I’d get to know you first.
What do you use your car for?
Do you hate the snow?
Who are the battle cats??
The same thing happens with resin.
You need to know what you’re going to make with the resin BEFORE you buy it.
So instead of asking, ‘What’s the best epoxy resin?’
You need to ask, ‘What’s the best epoxy resin for what I want to make?’
❌ Because one resin can’t do everything.
That means you need to decide what you’re making. Then, you can choose the best epoxy for your resin project.
Got that project idea in your head? Good. Now you must decide if you need a casting resin or a coating resin.
Casting resins are meant to fill a space. They mix in a thin consistency, allowing them to release bubbles quickly. You can pour them in thick layers, but you must use them in something with sides, like resin molds or a table space, because they are a watery consistency. Don’t use them to coat a surface because you’ll have voids and fish eyes.
Coating resins, also known as doming resins, are designed to coat a surface. They mix syrupy and self-level, giving a glossy surface coating. Because they combine thick, they shouldn’t be used in molds because they will hold onto bubbles. Instead, you can use this resin formula to give a shiny finish to jewelry blanks, tumblers, artwork, countertops, tiles, and more.
Okay padawan, let’s review.
Because if you get this part right, you’re 90% closer to making something FANTASTIC with epoxy.
Filling a space = casting resin
Coating or doming a surface = doming resin
Now that you’ve decided between a casting resin and a doming resin, you can pick the specific epoxy resin that’s best for your project.
How exactly do you do that?
Now’s when you need to learn more details about those resin formulas.
Specifically, there are three details you need to know before choosing the best epoxy resin for your project.
Minimum and maximum mixing amount
To ensure your resin cures as expected, you need to mix enough that it gets hot but not so much that the resin flash cures. That means you need to mix between the minimum and maximum mixing amounts.
Pot time
This is the amount of time you have to work with the resin once you mix the two parts together. You may also see this called open time or working time. You need to be sure you don’t mix so much resin that you can’t use it all in the pot time, and the resin starts to dry.
Curing time
Once your resin is mixed and poured, you must wait for it to harden. Knowing how long this takes helps you budget your time. Because tying up the kitchen table for 3 days may not work for your family. Or maybe it’s an excuse to go out to dinner three nights in a row. 😉
Phew, that’s a lot of information. Let’s go over this again.
Because this is pretty important, and I want to be sure you’ve got this down–
If you’re using molds, making a river table, or filling a vessel with resin, you need to use a casting resin.
If you’re coating a surface, like a countertop, art panel, or tumbler, or want to fill jewelry bezels with resin, you need to use a doming resin.
Once you’ve decided between those two options, then you can look at details like mixing amount, pot time, and cure time to choose the specific formula.
And here’s what I’m really proud of…
When I took over Resin Obsession in 2011, I made it my mission to get artists, hobbyists, and crafters the right resins to make ravashing resin art. (Instead of using whatever you could find and crossing your fingers…)
I work with an incredible team of people to bring you four resin formulas meant for the art market. Formulas that I use myself in my art career.
And they’ll work for you too. 🙂
Now — to be completely honest, they might be more than what you need. If you’re only looking to try epoxy resin once, then any resin will do.
But, if you’re hoping to make something gorgeous, bubble-free, that can turn into a side-hustle art career, then I think you’ll love these as much as our tens of thousands of other customers do.
Casting resins:
BEST RESIN FOR RIVER TABLES AND BIG MOLDS: Promise Deep Pour Epoxy Resin
- Mixing amount: 3 ounces to 3 gallons at once
- Pot time: 30 to 90 minutes
- Cure time: 72 hours
- Pour up to two inches thick
- Cures hard, durable and bubble-free
- No VOCs
- UV protectants to guard against yellowing
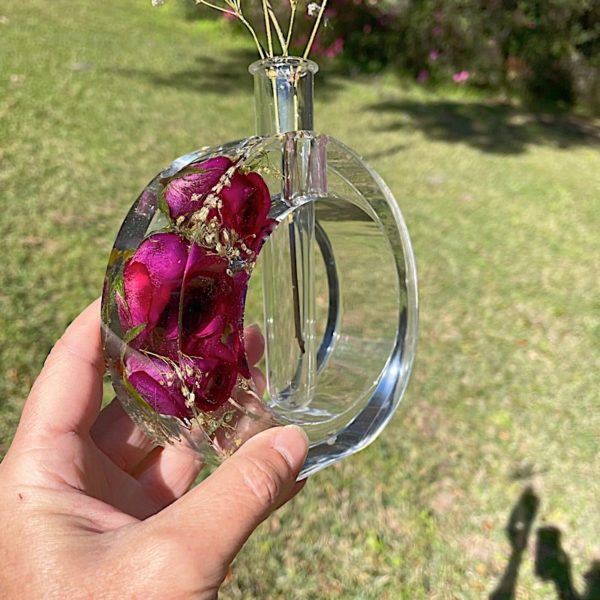
I used it to make this flower vase.
BEST RESIN FOR SMALL MOLDS: Amazing Clear Cast Super Clear Resin
- 1:1 mixing ratio
- Pot time: 20 to 25 minutes
- 24 – 48 hours
- Won’t soften with warmth or body heat
- Easy, bubble-releasing formula
- Low VOC, low odor
- Top-notch UV protectants to keep the resin crystal-clear
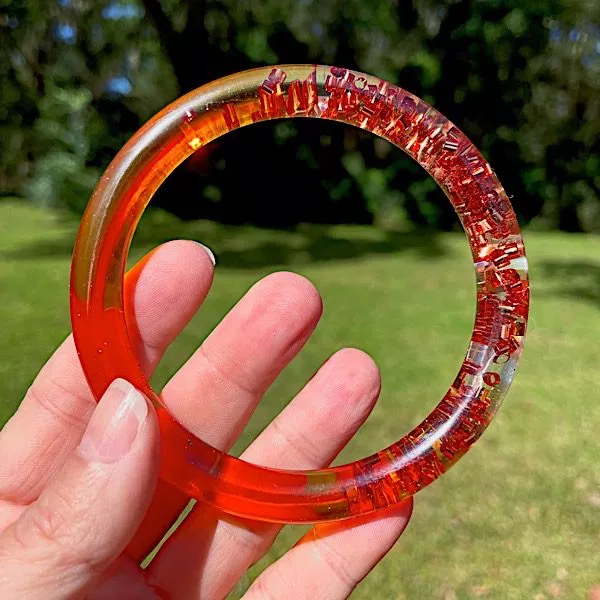
I love this resin for so many projects, but especially for making bangle bracelets. I don’t have to worry about them getting soft when I wear them.
Doming resins:
BEST RESIN FOR GIVING A COLORED RESIN COATING: Artwork Resin
- Mixing amount: 3 ounces to 1 gallon at one time
- Pot time: 20 to 35 minutes
- Cure time: 1 day
- Leave clear or tint with resin colors
- Low VOCs
- Self-levels
- UV additives to protect against yellowing
- Shiny finish
Making a new painting for my office was a cinch with this artwork resin. I love how it complements the decor.
BEST RESIN FOR GIVING A CLEAR, GLOSSY FINISH: Doming Resin
- Mixing amount: 1 ounce to 1 gallon
- Pot time: 30 to 50 minutes
- Cure time: 24 hours
- Beautiful, magnifying effect
- Low VOC
- Coats evenly to avoid fish eyes
- Top-level UV protectants to keep the resin clear and color-free
- High gloss finish
- Accepts colors readily
I use it to finish my all-time favorite gift — photo pendants. The high, glossy dome is just what a cute photo needs to make it pop.
Now, if you’re like me and can’t remember what you had for breakfast some most days…
You don’t have to sear this information to memory. (Although I’m convinced I could if only I could flush the Brady Bunch theme song from my head.)
⭐️ BONUS: Get all this information FOR ALL FOUR RESIN FORMULAS in an easy-to-follow, downloadable resin cheat sheet.
Now that you’ve got your resin, you need resin colors, tools, and supplies for your project.
You can use resin colors to make your resin transparent, opaque, or something in between. The tools and supplies are essential to make sure you measure and mix your resin correctly.
What else do you need to know about using resin?
Plan out your project.
Resin combines well with metal, glass, wood, stone, ceramics, fabrics, concrete, natural botanicals, and paper. There are, however, surfaces resin doesn’t stick to, so you want to make sure you aren’t trying to include one of them in your project.
Resin is not forgiving of poor techniques.
If you don’t measure accurately and stir thoroughly, you’ll end up with sticky resin spots, or it may not even cure at all.
Your resin crafting area needs to be warm enough for it to cure properly.
That means your room temperature should be in the low 70s F. Plus, your resin kit bottles should be warm. You can easily do this by placing them in a hot water bath for five to ten minutes before use.
Resin safety is critical.
You shouldn’t be scared about using resin, but having fun creating with resin means taking care of yourself. That means wearing safety gloves, having good room ventilation, and storing resin properly.
All resins are not the same!
Every resin has different directions, applications, cure times, and more. It’s crucial you know all the details about your epoxy before using it so you can avoid a resin disaster.
Ready to try creating your best arts and crafts with epoxy resin but feel hesitant to get started?
I get it. It’s why I wrote the ebook, Resin Fundamentals. I’ve condensed my knowledge and experiences into an easy-to-read PDF book for beginners. It’s what you learn from me at in-person classes, but from the comfort of a cozy chair. Buy now and receive an email download link in minutes.
Unpublished Blog Posts of Resin Obsession, LLC © 2023 Resin Obsession, LLC






Looking for doming jewelry resin, non-yellowing. It needs to come from the the EU (not England). From any place else it will set in Portugal customs, along with 50,000 other custom caught packages. Do you sell thru Amazon Germany? The German site is translated into English. Hope you can help.
Audie
Hi Audie, I’m afraid our resins are only available for sale in the U.S. and Canada.
I am having a hard time getting the resin to harden.. I warm them up use a scale to measure both and have let it sit over 24 hours.. I am trying to make gifts for the holidays and becoming very defeated.. I have watched all the videos you have.. any suggestions?
Hi Theresa, I’m sorry this is happening to you. This article will give you some ideas on what you can try differently: https://resinobsession.com/resin-frequently-asked-questions/12-reasons-why-your-resin-didnt-cure/
Theresa – In my experience it is better to measure the resin and the hardener by volume, not by weight – unless the instructions specifically say to use weight.
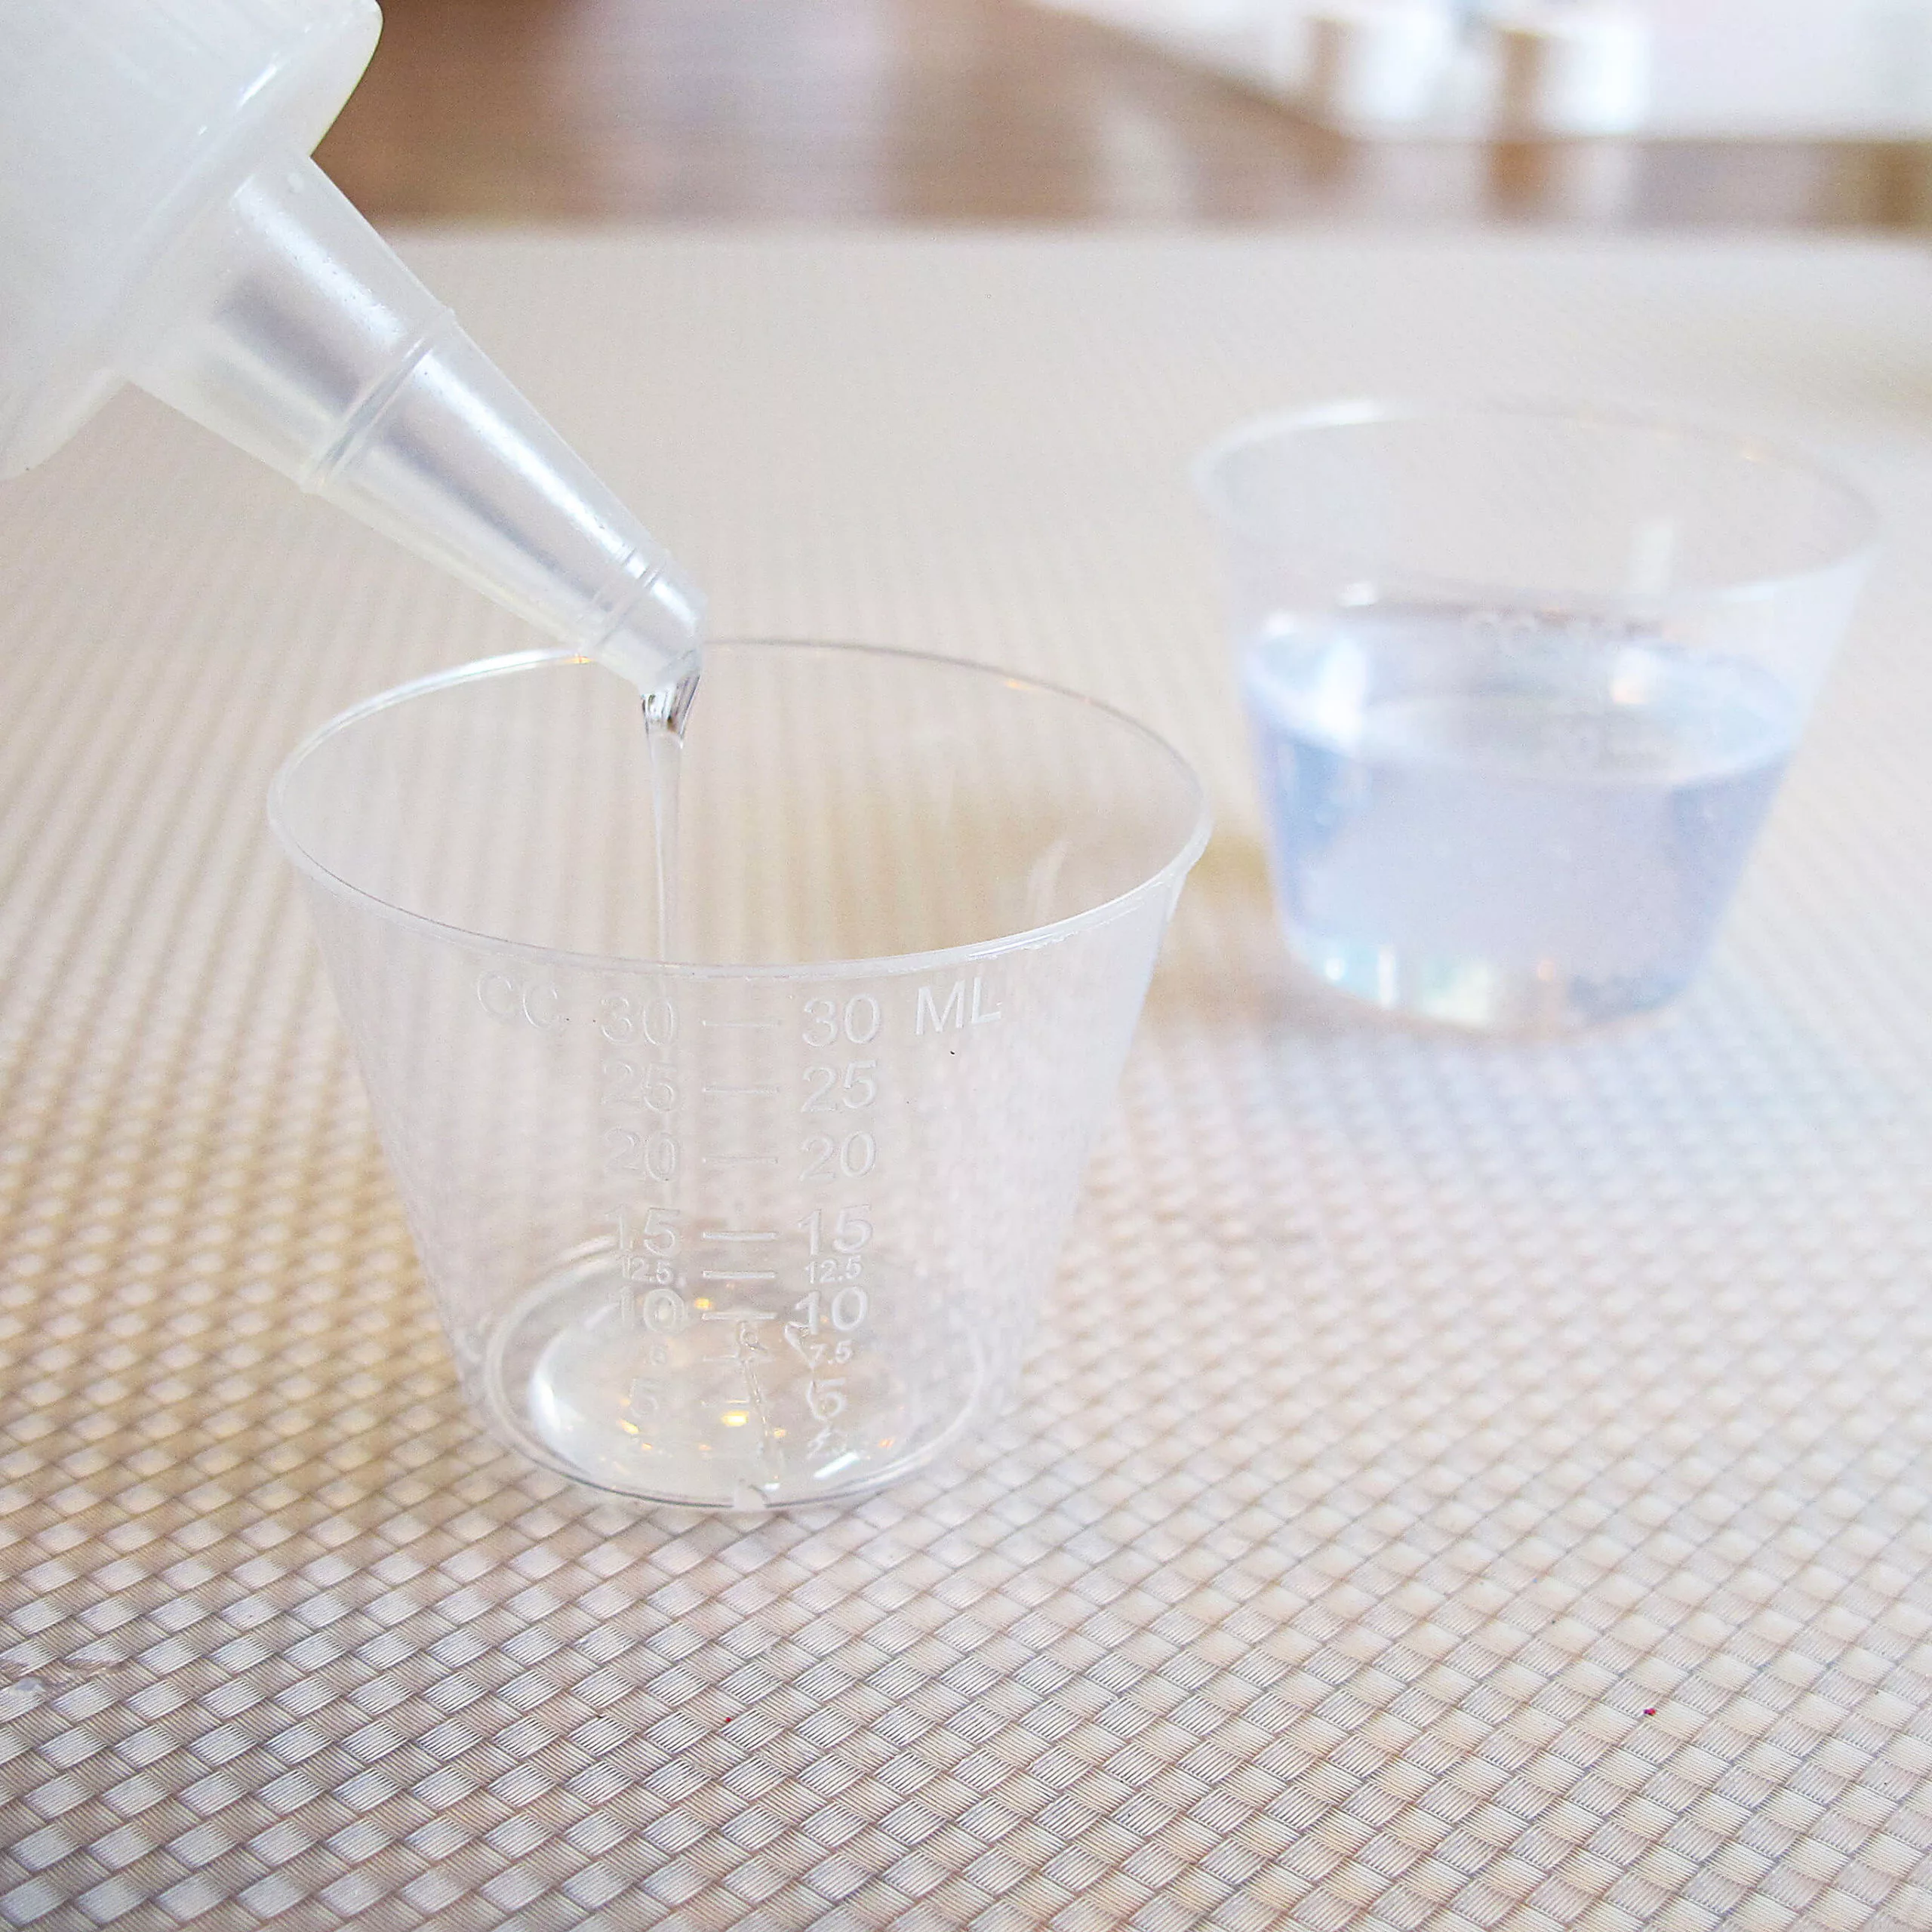
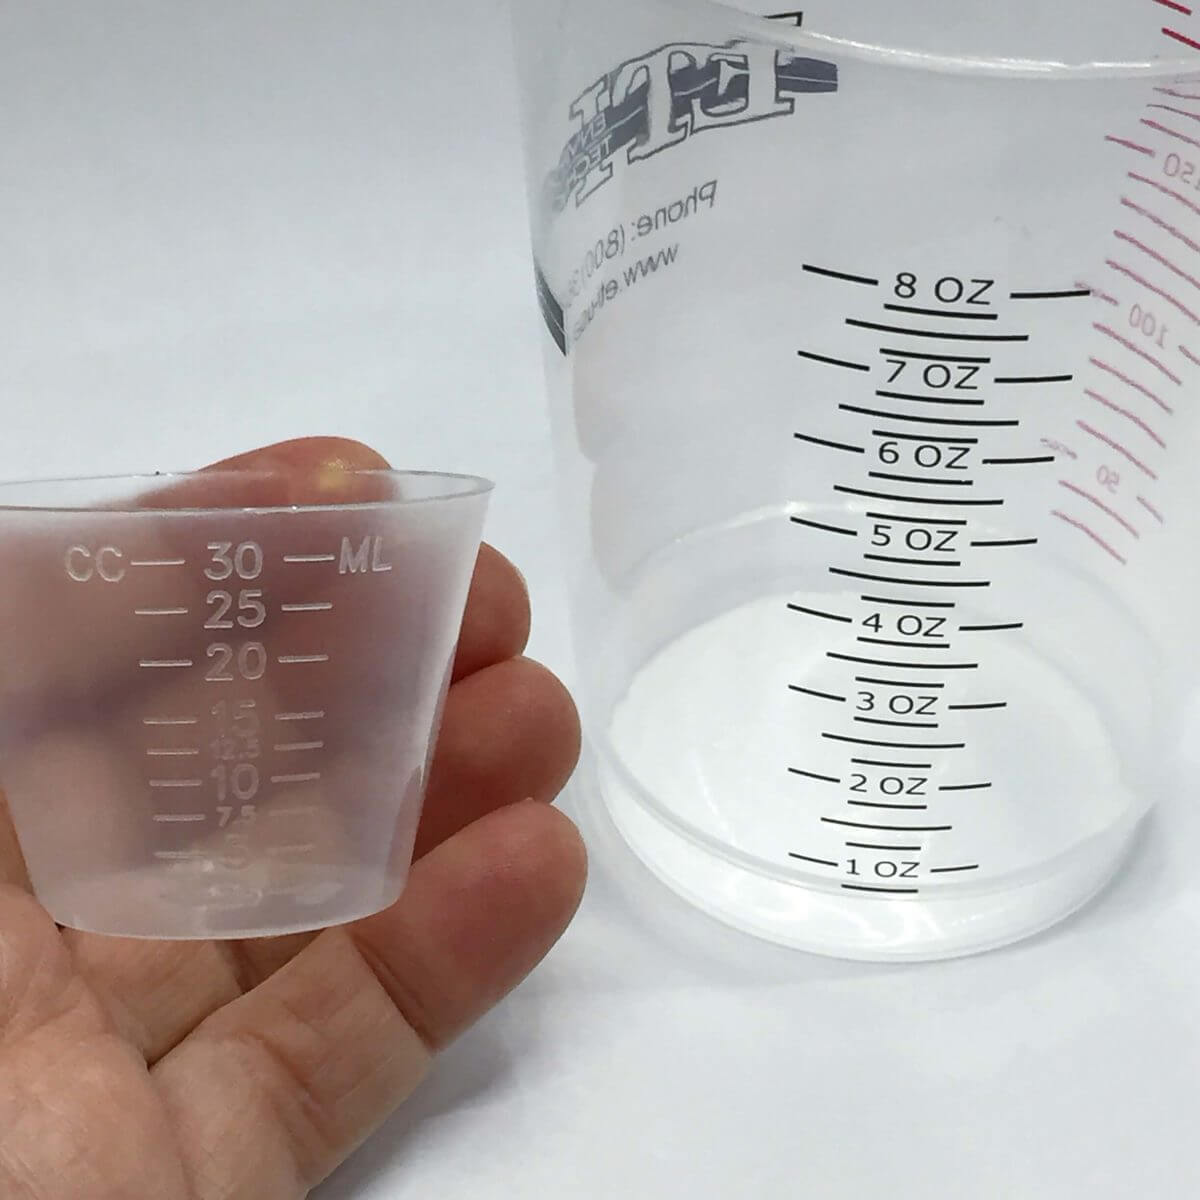
You can get a graduated cylinder or paint mixing cups with mL or other volume measurement.
Example: If you need 300 mL of epoxy for your project total: a 1:1 ratio would use 150 mL Part A and 150 mL Part B; a 2:1 ratio would use 200 mL of the 2-part component & 100 mL of the 1-part component; or for 3:1 ration you would use 225 mL of the 3-part component & 75 mL of the 1-part component.
Try this on your next pour and see how the epoxy turns out. Also, make sure your epoxy components and room temperature are around 72-75 degrees F.
Thanks for the article. One thing I am not sure about. You say and I quote “Pour up to two inches thick” does that mean in one go 2″ thick or made up of thinner layers with cure time in between?
The other thing that is not clear is what I can use as a base for the project to sit in. To make a starter round coffee tray I intend to use a section of plywood. Coat it with the release formula. Make a circle ring out of thick plastic. Release formula again. Seal the round plastic hoop with a hot glue gun. Then proceed with resin.
Is anything wrong with the above? |Never used resin before. But looking forward to trying it.
Is a hot air gun as good as a basic flame gun?
Hi Frank, such great questions!
You can pour the deep pour resin up to two inches thick at once, but you don’t have to. If your pour is going to be more than two inches, you’ll need to do multiple pours.
I’m afraid, though, your mold idea isn’t ideal. Even with mold release, the wood won’t release cured resin.
I prefer to use a heat gun over a flame gun because it’s less likely you’ll start a fire.
Hi Katherine,
I’m really struggling to find a silicone dome that is completely smooth on the inside, which will allow my resin to be glass like once set, just like a paperweight, the inner size needs to be a minimum of 19cm, with a height of at least 8.5cm, please can you help me,
I have read on other resin sites that silicone does not leave a smooth surface 🙁
Hi
My name is FaridafFaith Nassoro,From Tanzania..I am artist and very interest about using resin to make earing,necklace and much more..How can I get good resin in my Country??And are ready to teach more about using resin?
Hi Farida, I don’t know where you can get resin in your country, but we have books about resin here: https://shop.resinobsession.com/collections/books
Hi! I wanna ask, actually where we should keep the resin, at the cold or hot place?
That’s a great question, Sya. This article explains more: https://resinobsession.com/resin-frequently-asked-questions/how-to-store-resin/
What kind of resin for outdoor projects?
Hi Frederick, this article will help: https://resinobsession.com/resin-frequently-asked-questions/resin-outdoors/
Hi Katherine! I was just wondering, I’ve heard that resin can be susceptible to UV light, but I’d like to use a casting resin in a way that would interact a lot with blacklights, allowing the UVA light to pass through it. The light wouldn’t be particularly bright though. Would your casting resin formula be able to stand up to that, or do you know of a formula that would?
Hi Ian, I’ve never tried using our resin in this situation. I don’t know how it would do.
I have a urethane cast resin that I’ve poured in inlays in wood. I coated the wood first with a brush with the resin, no problems. Filled a large area that was a bit bubbly but good enough. Though in all the small word carvings and other smaller carvings it is ridiculously bubbly. I made sure to get rid of all the bubbles I could see with heat. Looks good till I come back the next morning and it looks crazy. Seems to expand alot as well. Please help.
Hi Mike, it sounds like the bubbles are escaping from the wood. Did you seal it before adding resin?
Yes with clear resin and had no issue with bubbles in that coat
Then it sounds like something with the new batch of resin. This article will help: https://resinobsession.com/resin-frequently-asked-questions/resin-bubbles/
I have used your resin awhile back and made jewelry and it was beautiful when I finished my projects. It now has turned a yellowy tint and has spoiled my jewelry. I have used the correct amount that you told me too. Does it still do this?
Hi Joy, all resins are going to yellow over time. Resins with UV inhibitors and stabilizers help extend the time before yellowing occurs. However, things such as mixing off ratio (even though it still can cure without tackiness), putting over an improperly cured lacquer, excessive heat, and or constant exposure to sunlight can speed up the yellowing process. How long the epoxy will last in its clear state is very difficult to predict.
On another note, I don’t find your details in our customer base. If you reach out to us through the contact page, I’m happy to help you with this further.
I have 1/2 gallon of superclear liquid glass seep pour Part A. I DO NOT HAVE PART B and only need a quart size. Why is it that’s cannot purchase just. Quart (or 1/2 gallon) of Part B only. Very discouraging and is forcing me to purchase another product
Hi Richard, that does sound frustrating. I don’t know why you can’t buy the hardener only (we don’t sell that resin brand), but we do help Resin Obsession resin customers in situations like this. You can shop our deep pour resin here: https://shop.resinobsession.com/collections/resin/resin-obsession-deep-pour-resin And should you ever need just one part, we’ll definitely take care of you. 🙂
Hi Katherine, I did the questionnaire about which resin to use for my project and was sent the super clear resin. I did a test and the mold I used was .8 deep and 3.9 long
the resin had tiny bubbles all along the sides.In your info page it doesn’t specify how deep a pour you can do with the super clear. I am wondering if I really needed the deep pour casting resin? the real project is a form I made that is about 1 and 1/8 inch deep and 2 and 1/4 wide. it is an opening in a sculpture I made with thinset mortar and it is coated in sand. that I coated with an acrylic medium. End result I hope to get is tiny a tide pool. Should I get the deep pour for this instead of what I was sent? Thank you for your time, Pam
Hi Pam,
So nice to meet you! I’m happy to help with this.
If I understand correctly, you want to fill a space that’s 1 1/8 inches deep by 2 1/4 inches wide. How deep is that area?
Once we know those details, we can input the numbers in the Resin Obsession resin calculator: https://resinobsession.com/resin-calculator/. If the calculator gives a number that’s under 3 ounces, you want to use the super clear resin. If that number is over 3 ounces, you want to use the deep pour resin.
The super clear resin can be poured at various depths. The 3-ounce mixing limit is the important part.
The bubbles along the side (where the resin meets the mold) happen because of the temperature difference. Warm resin + cold mold equals trapped bubbles. You can warm up the area with a heat gun to minimize that temperature difference. There are some other ‘anti-bubble’ tips here: https://resinobsession.com/resin-frequently-asked-questions/resin-bubbles/
What is the best resin to make butterfly wing jewelry? I have used a UV one but it ruined multiple butterfly wings. I use stainless steel or sterling silver and top them with clear cabochons. I also want to know what one to use with the blue Morpho wings too. Please and thank you for any advice.
Hi Julie, we have a book on this topic here: https://shop.resinobsession.com/collections/books/products/how-to-use-butterfly-wings-in-resin
I need a resin that works with solid machinable wax molds or 3D printed hard plastic resin molds. I am not using silicone molds. My first attempt without mold release the casting resin bonded to the mold. I used a 2 part resin (not from your company). So I need a resin that works with hard wax or polymer resin printed molds.
Hi Tim, it looks like we responded to your question about this in our forum: https://resinobsession.com/forums/topic/choosing-a-resin-4/
Thank you for all the information. Great job
Thanks heaps for the information on so many things. You have helped me a lot. I live in Australia and it would be greatly appreciated if you could convert temperatures to celsius and size measurements into metric units. Thank you for all the help.
Great post! I love the detailed breakdown of different epoxy resin options. It’s really helpful for someone just starting out with resin projects. Thanks for sharing your insights and tips!
What resin would I use for photograph coasters? Your video is so fast? I am a beginner and want to make them for a gift. Thank you
I would use a casting resin for coasters! Check out this one https://shop.resinobsession.com/products/super-clear-resin-12-oz-epoxy