
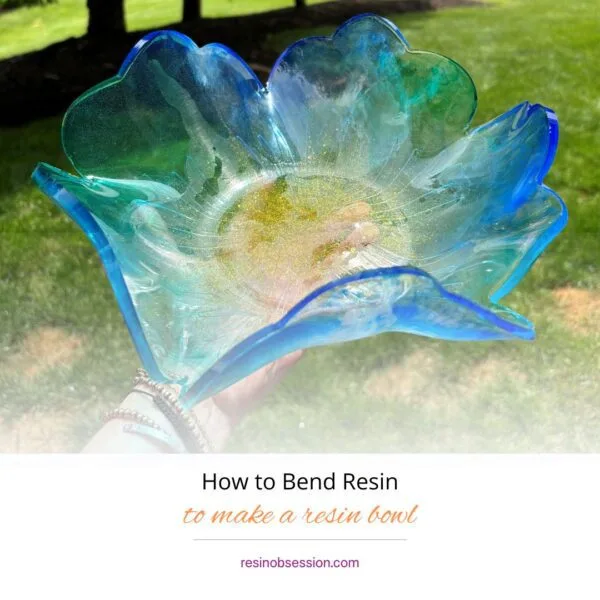
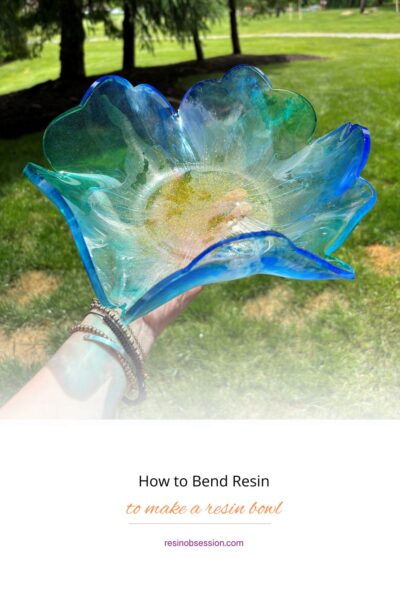
Hey there, Crafty Crusaders! Today, we’re learning how to bend resin to create a dazzling, one-of-a-kind resin bowl. It’s time to turn up the fun, crank up your creativity, and get a little quirky with some bendy, wobbly, resin magic. Grab your crafting gear, and let’s roll!
What You’ll Need to Create a Resin Bowl: The Resin Master’s Toolkit
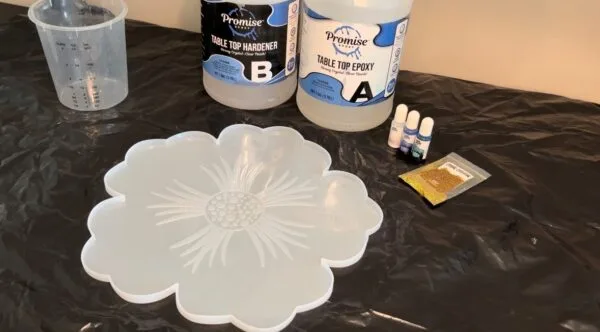
- Epoxy Resin and Hardener: For this project I used Promise Tabletop Epoxy.
- Mixing Cups and Sticks: For stirring up some magic.
- Silicone Mold: A flat mold for your resin masterpiece. I got mine on Amazon
- Heat Gun or Hairdryer: The secret weapon for getting those bubbles out.
- Gloves and Goggles: Safety first, even in the land of creativity.
- Colorants and Glitters: Because who doesn’t love a splash of sparkle?
- A Bowl or Rounded Object: The template for your resin bowl.
Step 1: Setting Up Your Crafting Space
First things first—let’s set up a space where creativity can run wild and free. Cover your work surface with some sort of protection to catch any rogue resin drops. Suit up with gloves and goggles, because we’re about to get hands-on.
Step 2: Mix the Resin
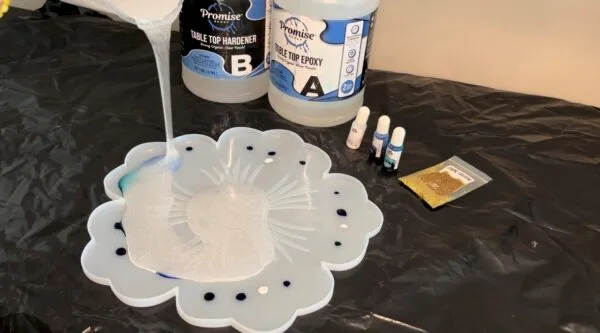
Measure out equal parts of resin and hardener according to the instructions on your bottles. Pour them into a mixing cup and stir slowly. Mix for 3-5 minutes until fully combined.
Step 3: Get Creative
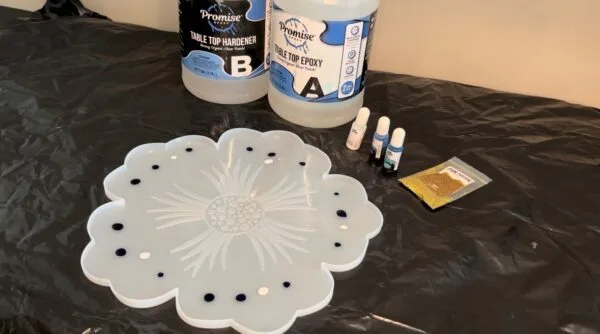
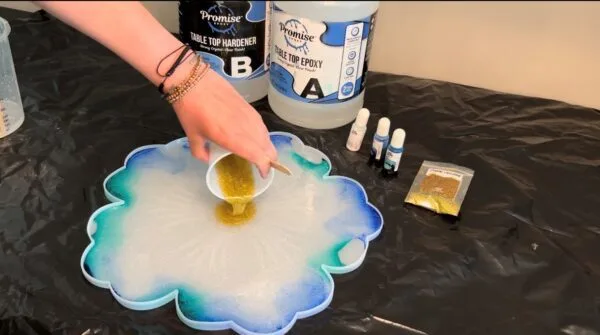
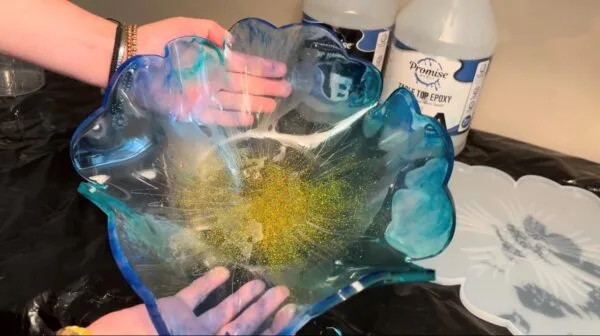
Now, this is where your creative side gets to unleash! Pick your favorite colors and sparkles to make whatever design you like! For my bowl I added a few drops of colorant directly to the mold as well as mixed glitter into the epoxy.
Step 4: Pour your Resin
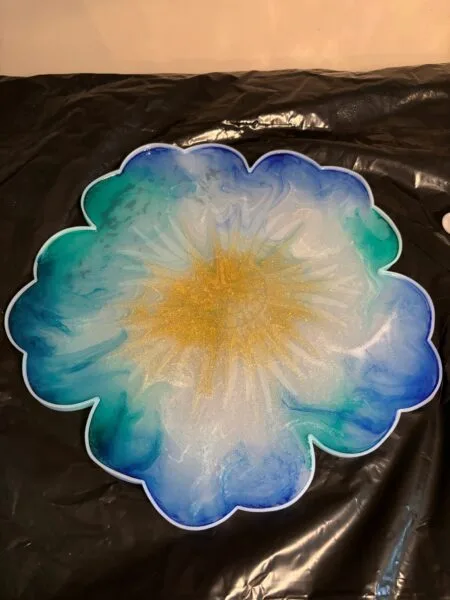
Pour your resin into a flat silicone mold. Spread it out evenly with a stick or a spatula. You can swirl colors together, create marbled effects, or sprinkle in some extra glitter. It’s like decorating a cosmic pancake!
Step 5: Let Your Resin Cure… Just a Little
Here’s the trick: let your resin cure until it’s firm but still flexible—usually around 8 hours, depending on the resin brand. Keep checking it; you want it to be bendy but not sticky.
Step 6: Bend your Bowl
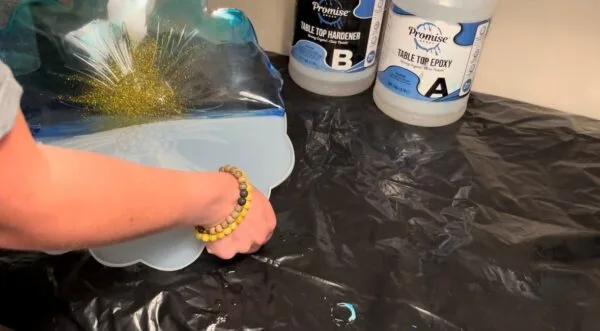
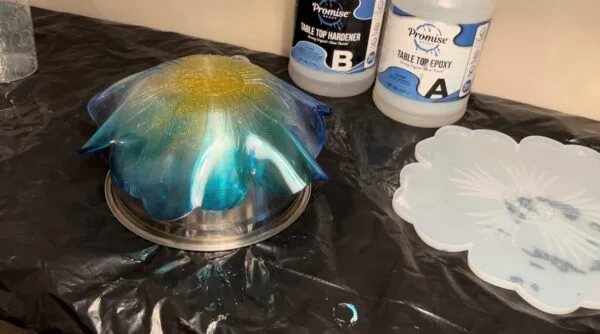
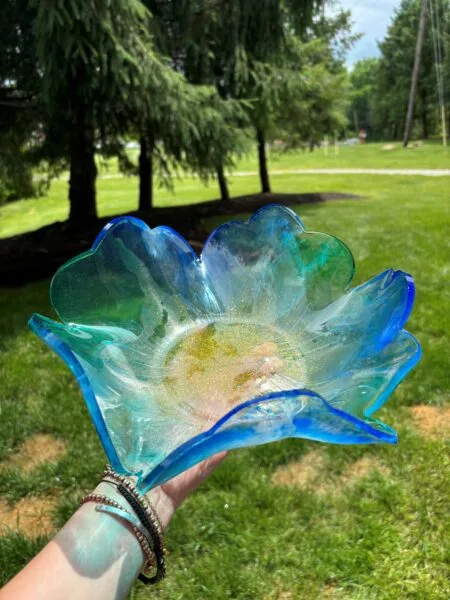
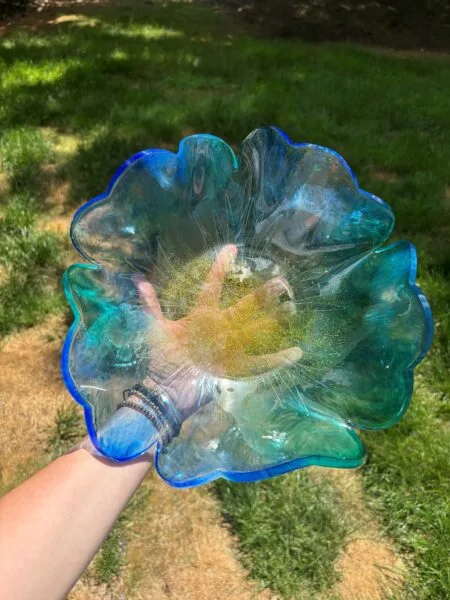
Once your resin is at the perfect bendy stage, it’s showtime. Remove your resin from the mold. Grab your rounded object (a bowl, a ball, or anything with a curve). Carefully drape your bendy resin over it, shaping it into a bowl. You might feel like a sculptor at this point—embrace it!
*Pro Tip: If your resin has cured too much use a heat gun or hairdryer to gently warm up the resin. This makes it even more flexible and ready to shape. Be careful not to overheat—think gentle warmth, not desert sun.
Step 7: The Final Cure
Once you’ve shaped your bowl, let it sit and fully cure. This might take another 24 hours. Patience, grasshopper! Your resin bowl is becoming the masterpiece it was destined to be.
Step 8: Show off your Resin Bowl
Once fully cured, gently lift your new resin bowl off the round object. Give it a gentle buff if needed, and voila! You’ve created a dazzling, funky, resin bowl that’s perfect for trinkets, snacks, or just showing off.
Bonus Tips for Resin Bowls:
- Experiment with Layers: Pour in layers of different colors to create a layered effect.
- Add Embellishments: Throw in some dried flowers, tiny shells, or beads before curing for extra pizzazz.
- Play with Sizes: Try different-sized molds and objects to create a whole set of resin bowls.
And there you have it, crafty comrades! Bending resin into a bowl is not only a fun project but a fantastic way to let your creativity shine. With a bit of patience and a lot of imagination, you can transform simple resin into a wobbly, wonderful work of art. So go ahead, bend it like resin, and create a bowl that’s uniquely you. Happy crafting! 🌈✨🏺
This bowl is so pretty. Easy to follow your instructions. Thank you.